
This tutorial is from You Are My Fave
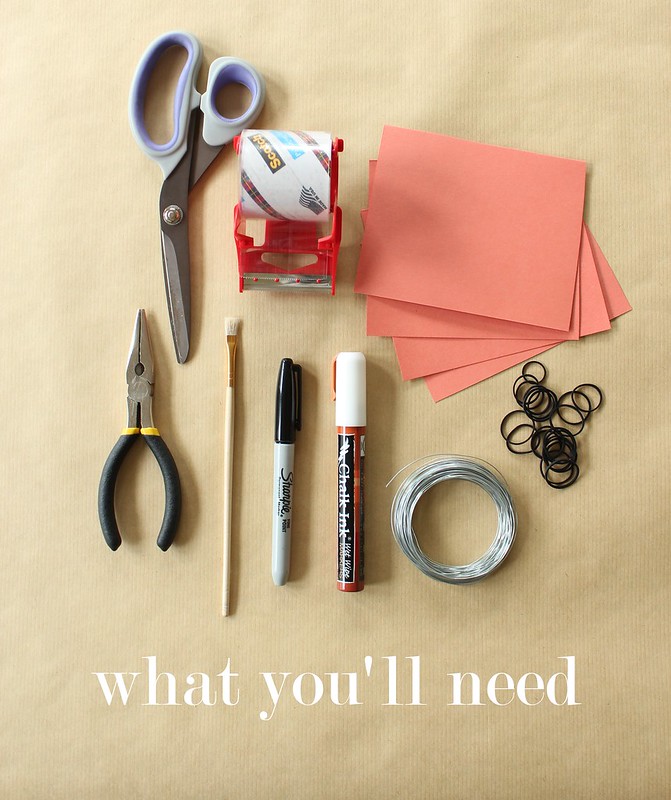
Materials: You’ll need heavy cardstock, 24 gauge wire, silicone rubber bands (I found mine in the hair aisle at Walgreens) needle-nose pliers, scissors, tape, a paintbrush, a black marker, and a white ink pen.

Step 1: Measure and cut your wire. The wire used for the top wings will be 4 inches, and the wire used for the bottom wings will be 5.5 inches.
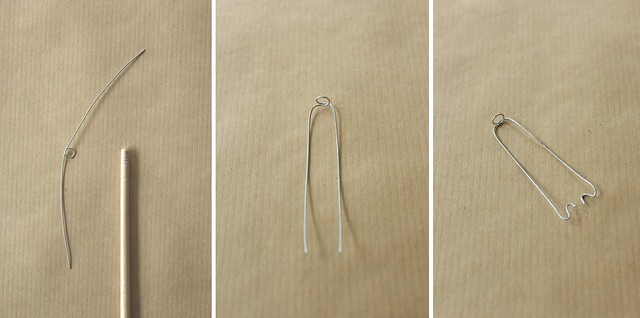
Step 2: Find the center of the longer wire. Wrap it around the base of your paintbrush to form a loop.
Step 3: Keeping the loop horizontal, bend the tails of the wire down vertically.
Step 4: Bend each tail in towards each other to form a hook to hold the rubber band.
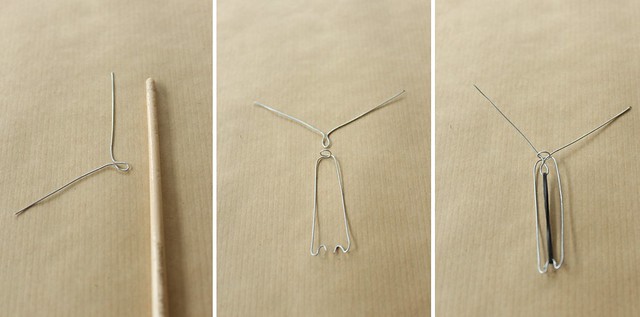
Step 5: Find the center of the shorter wire, and wrap it around the base of the paintbrush. Instead of forming a loop, pinch the wire to form a circle, and bend the tails of the wire out to form the base for the wings.
Steps 6 & 7: Assemble the body of the butterfly. Wrap the rubber band around the top wire and set it in the center. Thread the rubber band through the loop of the bottom wire, and attach it onto the bottom hooks.

Step 8: Draw the shape of your wings and cut them out. You can make them as plain or fancy as you want. They don’t have to be perfect—be creative!
Step 9: Outline the edges of each wing with your black marker. Draw lines and doodles on the wings to replicate a Monarch. (Google image helps!)
Step 10: Use the white ink pen to draw dots on the outer edges of each wing

Step 11: Tape each wing to the body of the butterfly.
Step 12: Holding the body of the butterfly with one hand, use your forefinger to turn the top wings and wind up the rubber band. I found that between 40-50 rotations made the wire nice and tight. Be careful not to wind too far, or the wire might bend!
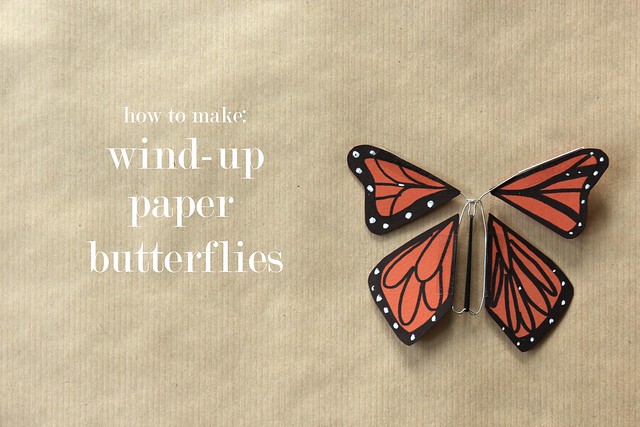
Step 13: Carefully insert the wound-up butterfly into a card or book. Whoever opens it will get a flutterly little surprise!
